This article provides instructions on how to add notes and how to add attachments a resident. To access the Notes/Attachments, select the resident, then select Notes/Attachments from the menu options displayed in the details panel.
Adding Notes:
After selecting the Notes/Attachments option from the menu, you will land on the Notes section by default. To add notes you would:
1. Enter your note in the Note entry field.
2. Select any applicable note types or note tags. These may make it easier to differentiate the notes or locate specific notes.
3. If appropriate, select the option to copy the note to the Manager's Log. It's important to remember that only the note would be copied to the Manager's Log. Any attachments related to that note would not be copied.
4. There are also options to set reminders about the note
5. Click on Add Entry located at the bottom of the page.

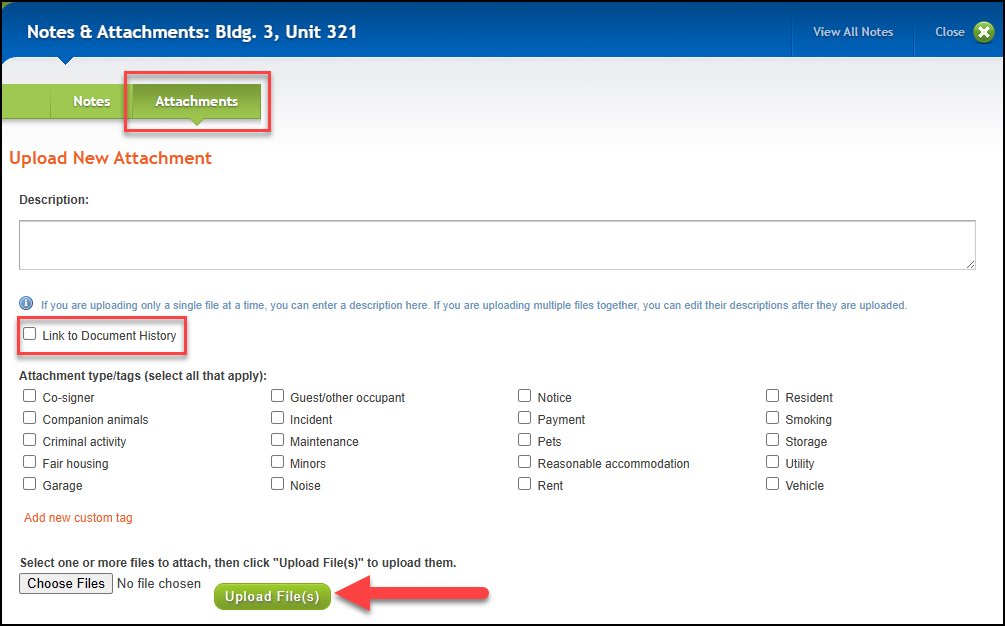
Adding Attachments and Linking those to a Resident's Document History:
After selecting the Notes/Attachments option from the menu, you will land on the Notes section by default. /to get to the attachments, click the Attachments on the green banner.
1. Enter a description of the attachment to be uploaded.
*Note: If you are uploading multiple files together, you can edit their descriptions after they are uploaded.
2. Select the box to Link to Document History.
3. Select any applicable note types or note tags. These may make it easier to differentiate the notes or locate specific notes.
4. Click on Choose Files to select the file(s) to upload, then click on Upload Files.
Quick Directions:
Residents>> Select Resident Profile>> Select Menu Option - Notes/Attachments. Select Attachment Tab>> Enter information- including checking to link to Document History.