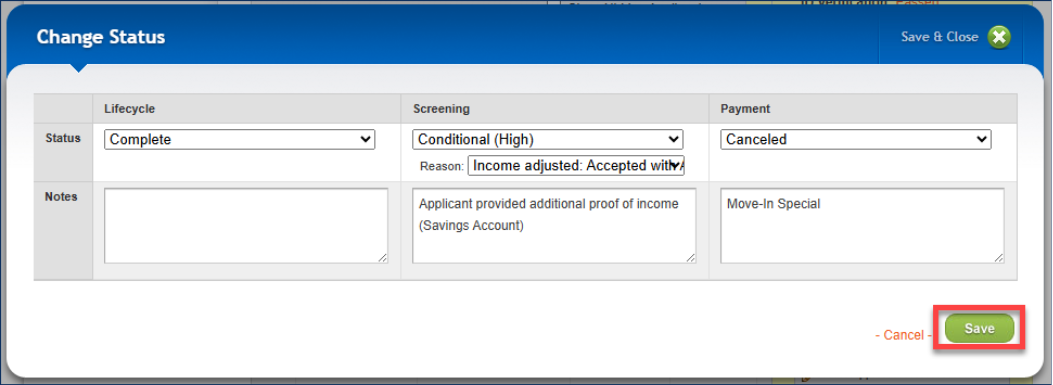
This article explains how to manually update an applicant’s Status in TenantTech. Use this guide when an applicant’s status needs to be corrected, overridden, or updated to reflect their current step in the application process, including moving the applicant into a unit.
Status Types
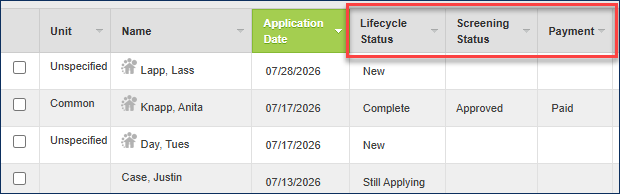
Applicant statuses help show where an applicant is in the application process. There are three types of statuses:
- Lifecycle Status: Shows where the applicant is in the overall process, such as Still Applying, New, Screening, or Complete.
- Screening Status: Shows the result of the applicant’s screening, such as Approved, Denied, or Conditional.
- Payment Status: Shows the status of the applicant’s application fee, such as Paid or Cancelled.
To help teams manage applicant statuses confidently and consistently, upper management is encouraged to configure and periodically review user-class permissions for each status type. Permissions can be tailored by role. For example, permissions can be set in a way that allows a manager to be able to update Lifecycle Status but not Screening Status.
- Company Admins can update an individual user’s class by going to Tools, selecting Users, and choosing Edit User from the menu.
- To view or edit company-wide user privilege settings by user class, go to Tools, then select User Privileges.
*Note: If you do not see the same options shown in this guide, your TenantTech user class may not have permission to allow you to access the settings. You may contact upper management to confirm your user permissions or to make updates on your behalf.
Applicant statuses may be updated in different ways:
- Automatically by the system
- Through an integration, such as an integrated screening company.
- Manually by a user, if their user class has permission to make the change
Each status type updates separately. For example, screening company results should only update the Screening Status, payment activity should only update the Payment Status, and moving an applicant into a unit should only update the Lifecycle Status.
Steps to Manually Change an Applicant’s Status
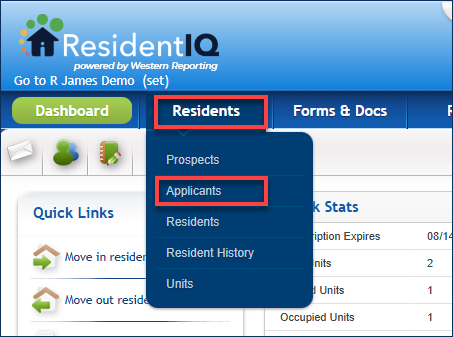
1. Hover over the Residents tab and select the Applicants page from the drop-down menu.
2. From the applicant list, select the applicable applicant or applicant group.
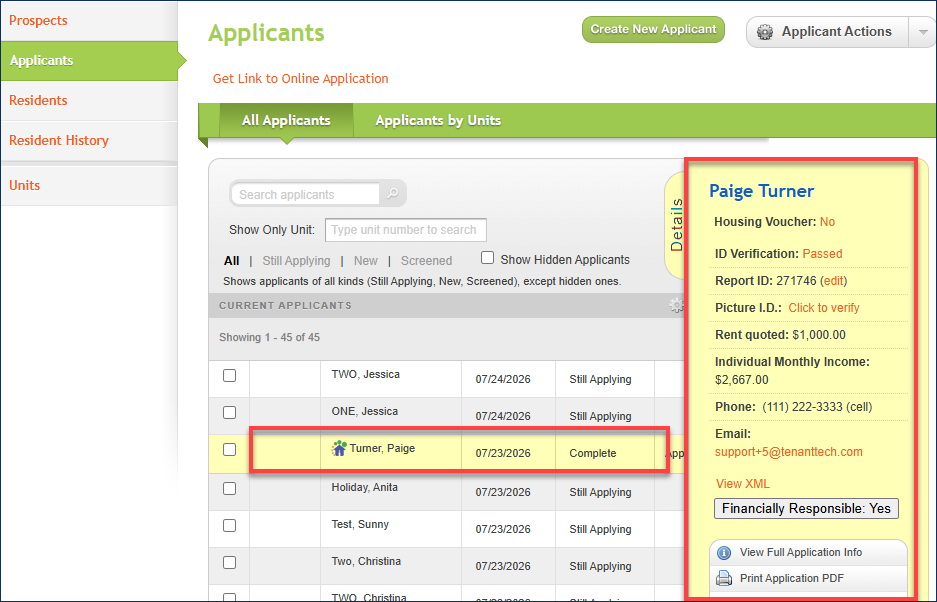
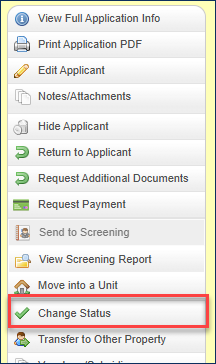
3. In the applicant’s details panel, select Change Status.
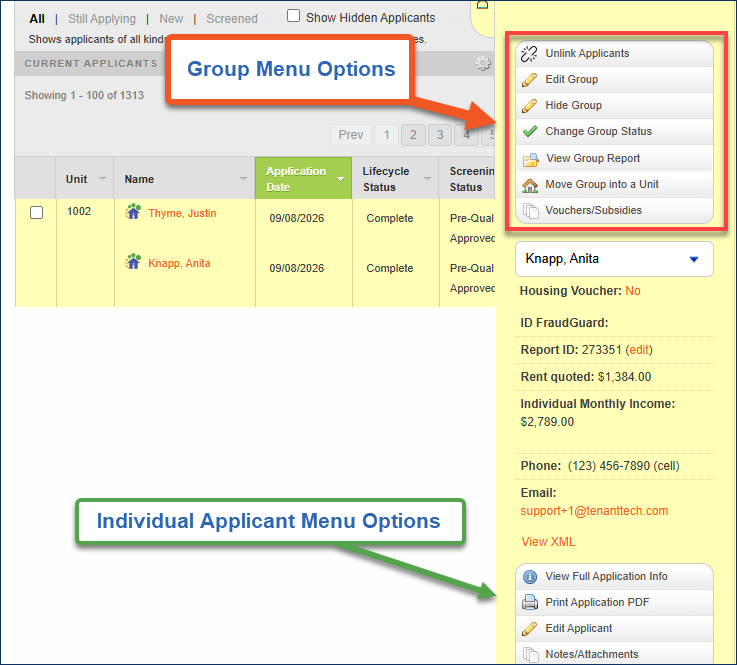
If you select an applicant group, the Applicant Details Panel displays a group management menu in addition to the standard menu for individual applicants. From the group menu, select Change Group Status.
*Note: For detailed instructions on creating applicant groups, see Linking Applicants - Creating Applicant Groups.
4. In the pop-up window, use the applicable drop-down menu to select the appropriate status. Add any notes as needed or required. Before closing the window, be sure to click Save.