
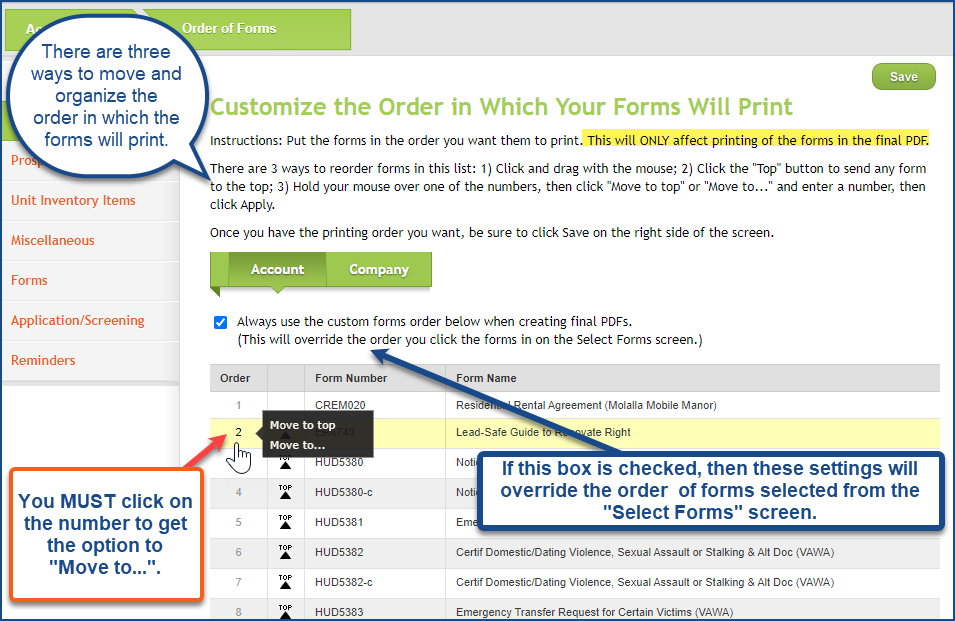
The purpose of this article is to guide users through updating the Order of Forms setting at the Account or Company level. Users with the appropriate permissions can customize the order in which forms appear in the final PDF packet and the sequence in which they are presented for signing after the forms are created.
This setting does not change the order of forms listed on the Select Forms page in program. It only affects the print order for the forms that are created.
How to change the Order of Forms
Navigate to Account Settings
Select Order of Forms
Select Account or Company Tab to determine which Print Order list you are modifying.
- Note- Modifying the Company list will impact all accounts using this setting.
Select checkbox - Always use the custom forms order below when creating final PDFs.
Review the list of available forms.
Use the drag-and-drop functionality to move forms into your preferred order.
Select Save- to lock in changes to the print order that you have created in settings.
Important Notes
The Order of Forms list includes all forms available in the program, regardless of unit type or city specification.
Because all forms are displayed together, you may see similar forms for different unit types.
For example:- Rental Agreement (Apartment) - M001
- Rental Agreement (Single Family) - M201
Before changing the order, confirm which version of the form your organization uses. Similar forms may have different form numbers, unit types, or location requirements. Verifying the correct form helps ensure it appears in the desired position in the final PDF packet and signing sequence.
Helpful Tip
Press Ctrl + F on Windows or Command + F on Mac to quickly locate a specific form before moving it to the desired position.