
This article provides a step-by-step overview of the online application process so users can understand what applicants may experience as they complete an application.
Use this article when guiding an applicant through the online application or when you need a more in-depth understanding of the process.
*Note: The available fields of an online applications may vary based on the application type, state, and other factors.
For Oregon and Washington properties, if you are having trouble editing the PDF version of the online application, please see Editing the PDF Application (MFNW).
Online Application from the Applicant's Point of View:
1. Welcome:
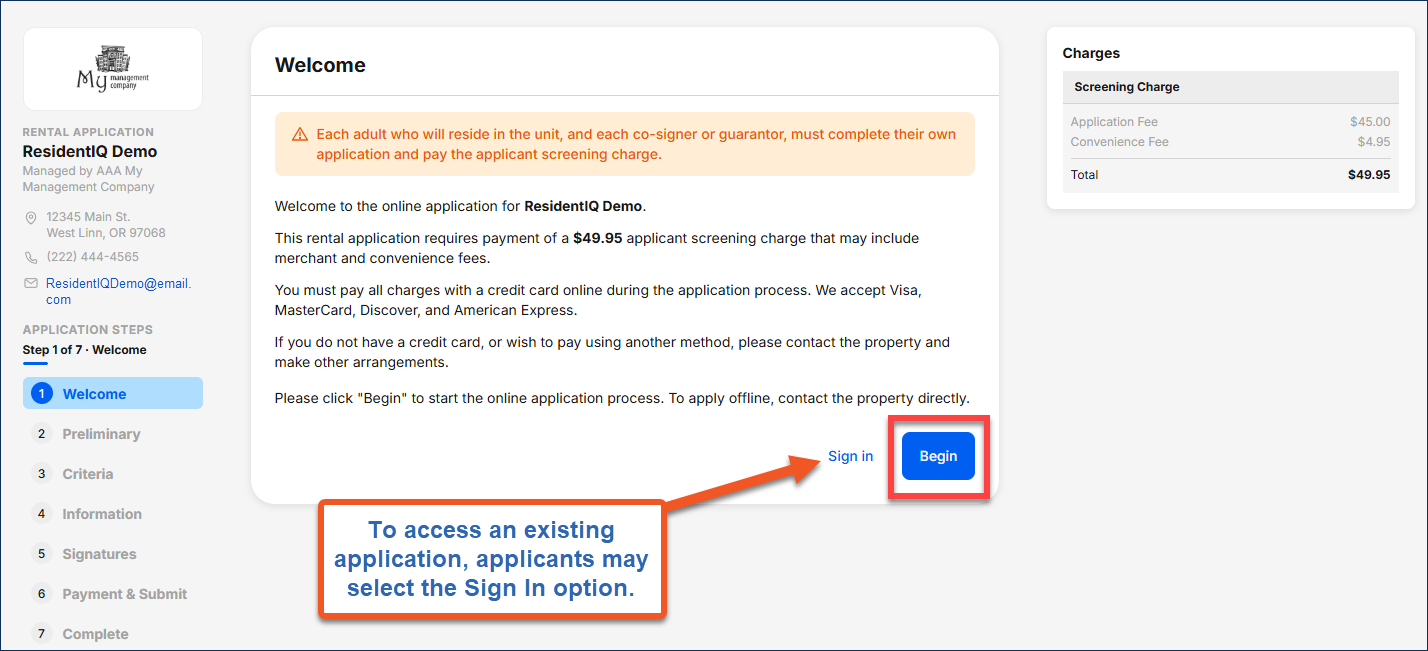
When an applicant clicks a property's online application link, the first page they see is the Welcome Page. This page displays the application fees and accepted payment methods.
- To resume an existing application, such as one that was interrupted before completion, applicants must select Sign In. The applicant will be prompted to enter the email address and password they created when they started the application.
- To start a new application, select Begin.
*Note: The Charges box in the upper-right corner remains visible throughout the application process. Convenience fees are set by the payment processor and may vary based on the processor used by the property.
2. Welcome – Create Your Account:
New applicants enter their legal first and last name and contact information. They can also review the consent language on bottom of the page. If they agree, they click Continue.
*Note: After the applicant leaves this page, their name cannot be changed. If the name is incorrect, they must submit a new application.
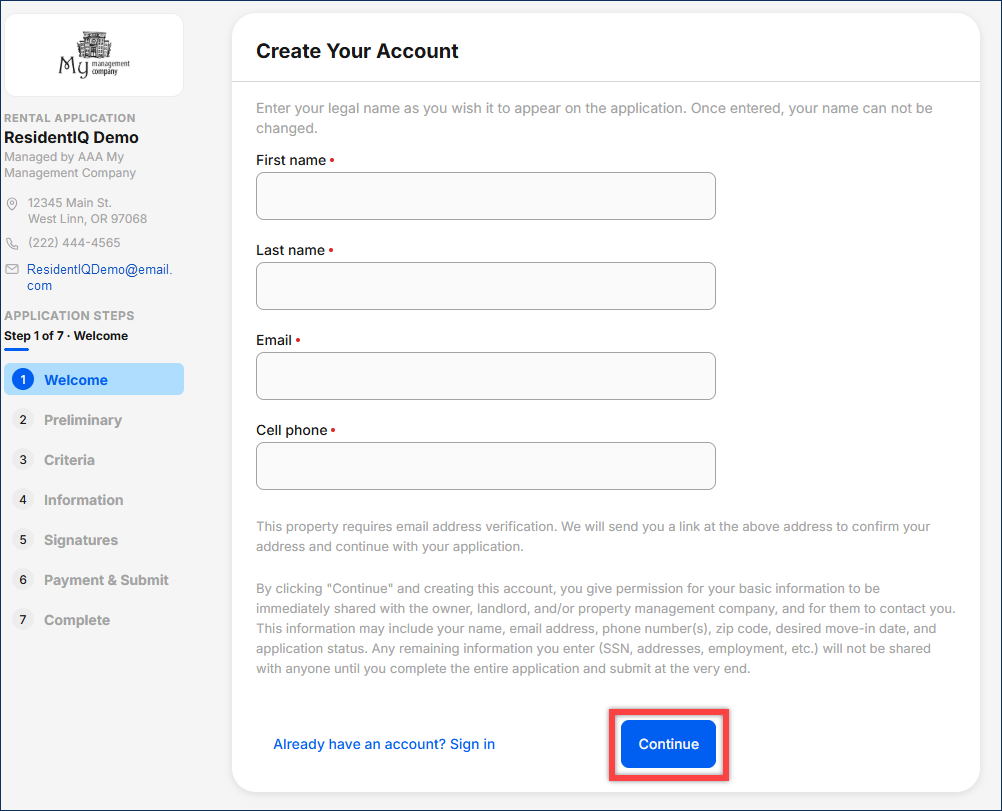
*Note: To access an existing application, the applicant should select Already Have an Account? Sign In, located at the bottom left of the page.
3. Welcome – Verify Your Email Address:
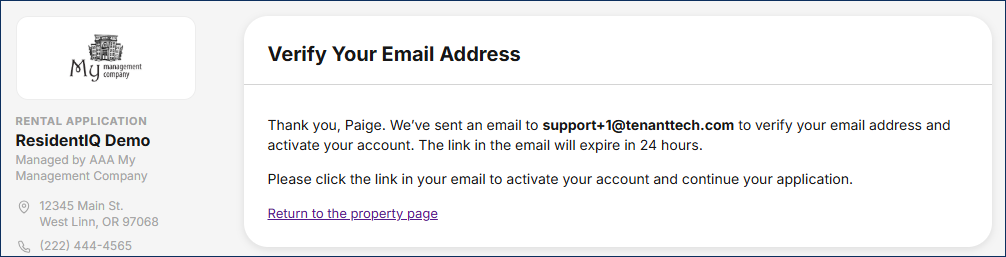
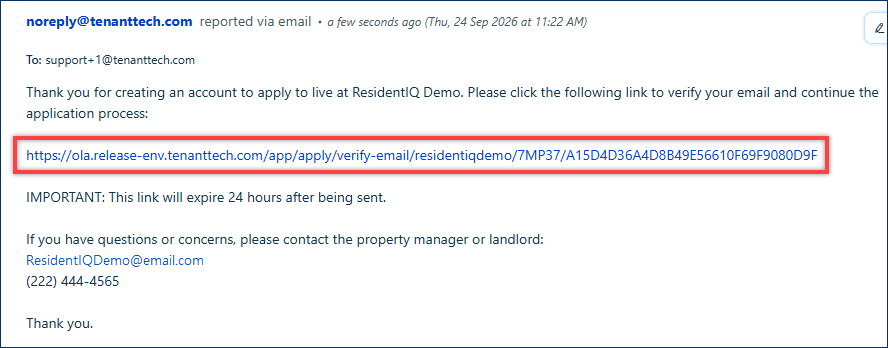
Applicants receive a verification email at the address they provided. They open the email and select the verification link to confirm their email address and activate their application account. The link returns them to the online application, where they create a password.
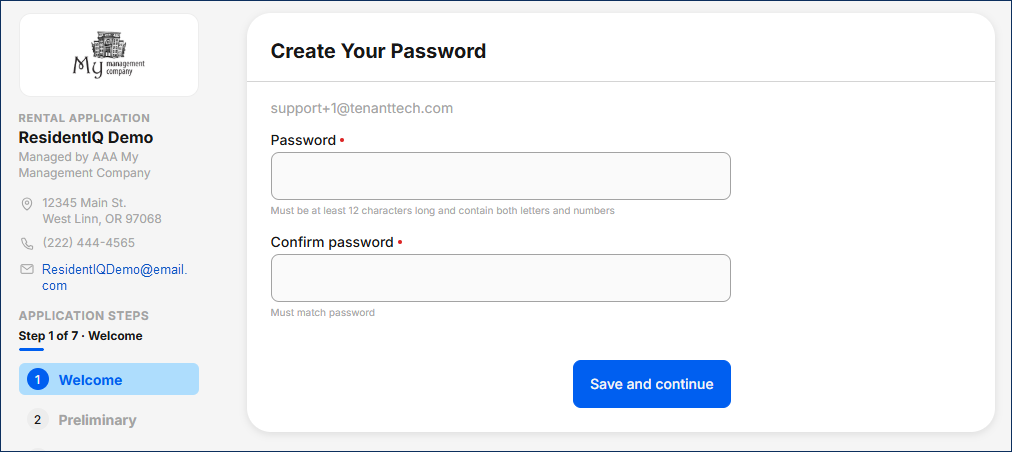
4. Welcome – Create Your Password:
Applicants create a unique password for their application. The password must contain at least 12 characters and include both letters and numbers. If applicants leave the application and return later, they can sign in using their email address and the password created in this step.
*Note: If an applicant starts a new application, or if more than one applicant uses the same email address, each application must have a unique password. The same email address can be used, but the same password cannot.
5. Preliminary Information:
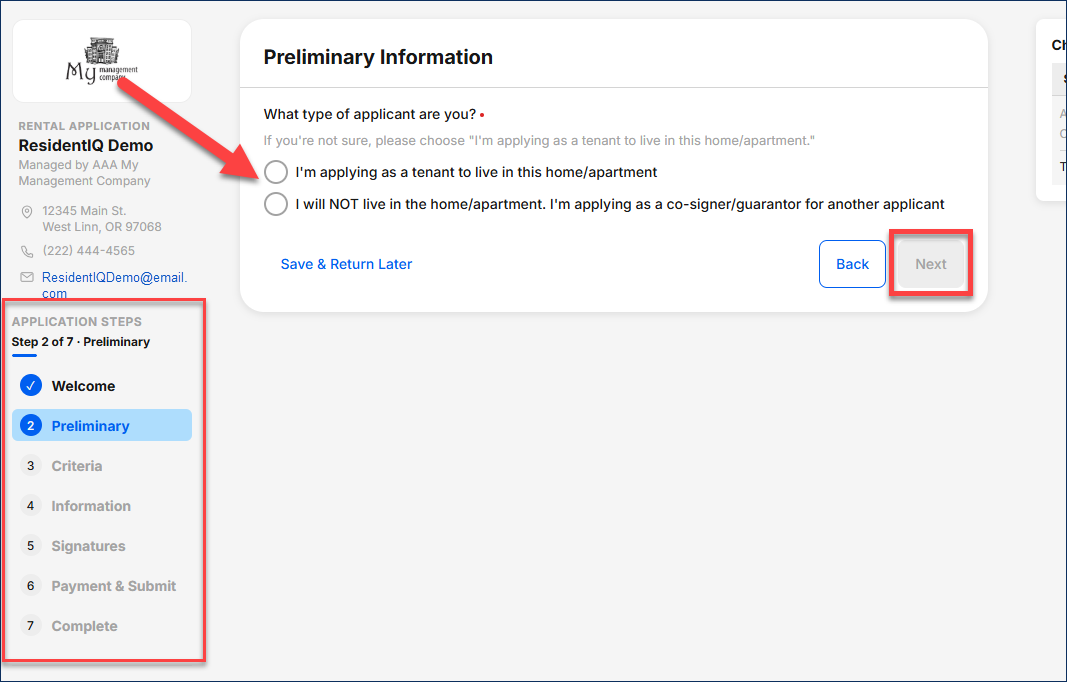
Applicants choose whether they are applying to live in the home or applying as a co-signer/guarantor. After making their selection, they click Next to continue.
*Note: The panel on the left side of the page tracks the applicant’s progress. A blue circle with a check mark identifies each completed section. The section currently in progress is highlighted in blue.
6. Criteria - Residency Criteria:
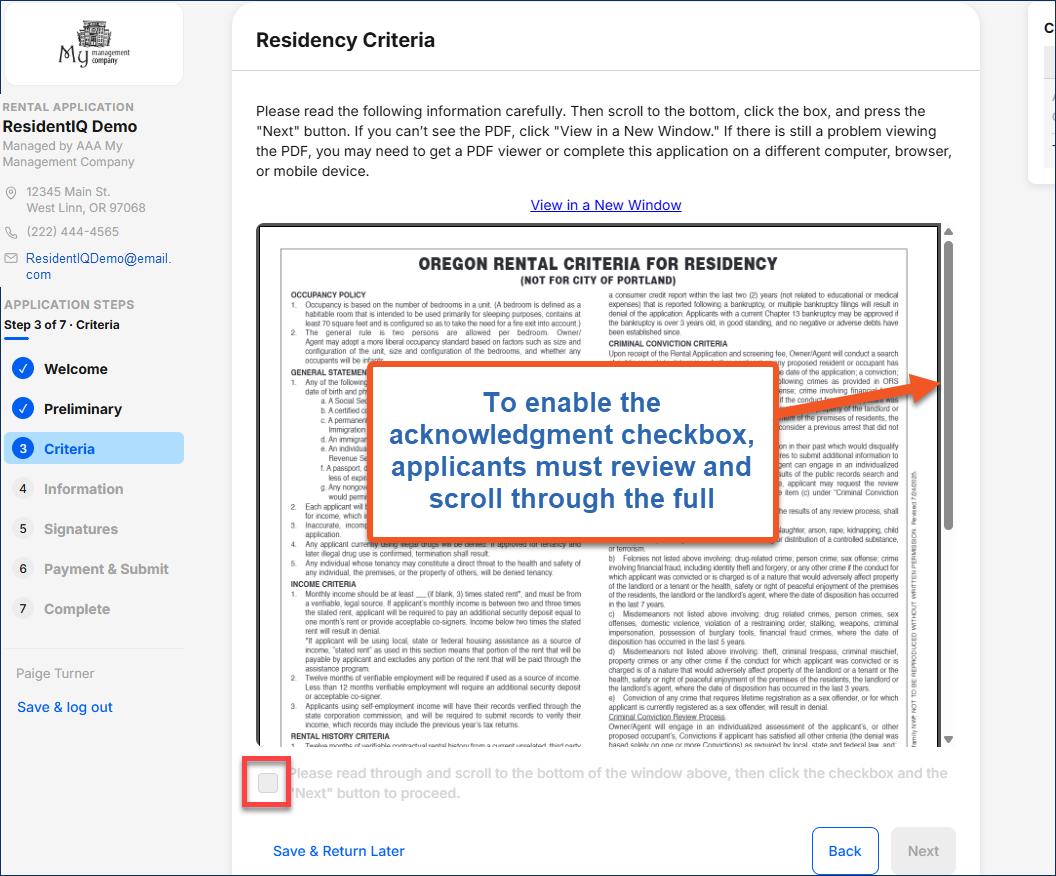
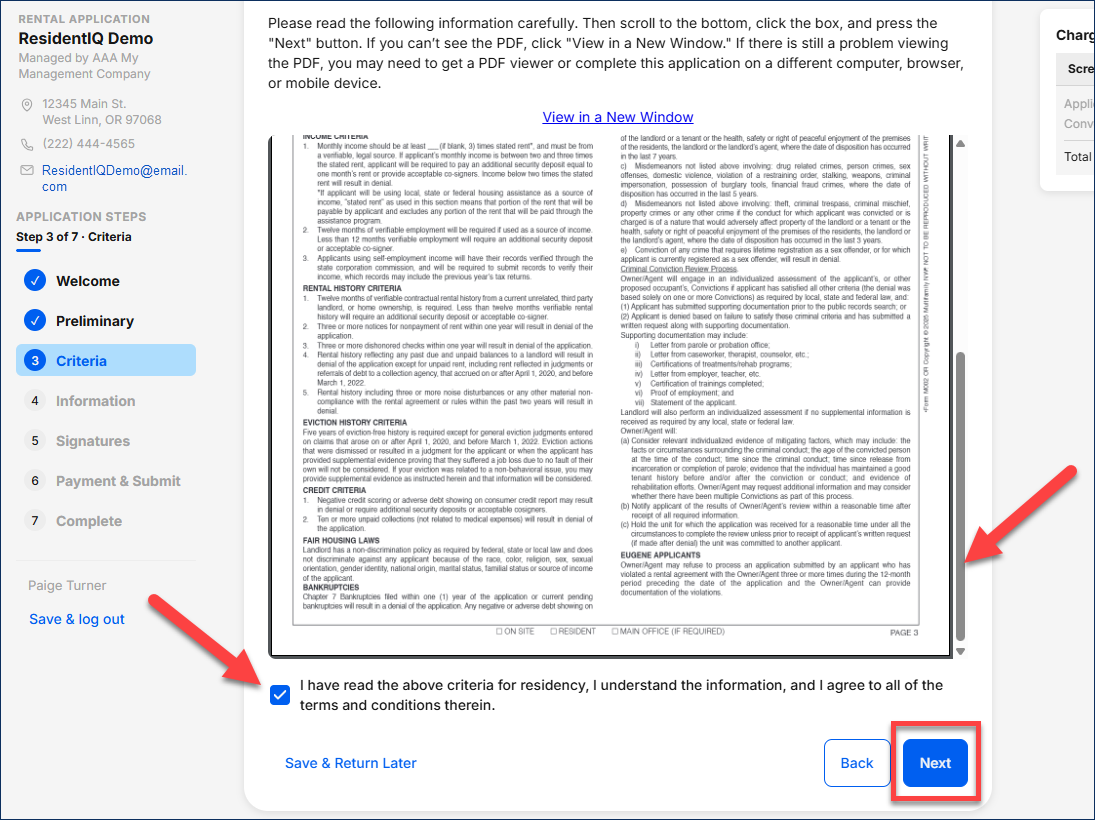
Applicants review the Criteria for Residency. Upon scrolling to the bottom of the page criteria page, the acknowledgment box then becomes active. They select the box to confirm that they have read, understand, and agree to the criteria. Then, they select Next.
7. Information - Prospective Residence:
Applicants enter information about the unit they want to apply for, their expected move-in date, and their personal identification details.
8. Information - Employment History:
Applicants enter their employment information and indicate whether they have a housing voucher.
9. Information - Other Applications:
If an applicant has applied to another property managed by the same management company within the last 60 days, they enter that information on this page.
10. Information - Convictions:
Applicants select the appropriate option for each question about arrests, bankruptcy, eviction, and foreclosure.
11. Information - References:
Applicants may enter the name and contact information of a person who can be contacted in an emergency or in the event of the applicant’s death.
12. Information - Other Occupants:
Applicants enter information about anyone else who will live in the unit, including other adults, children/minors, and caregivers. Co-signers should not be entered here because they will not live in the home.
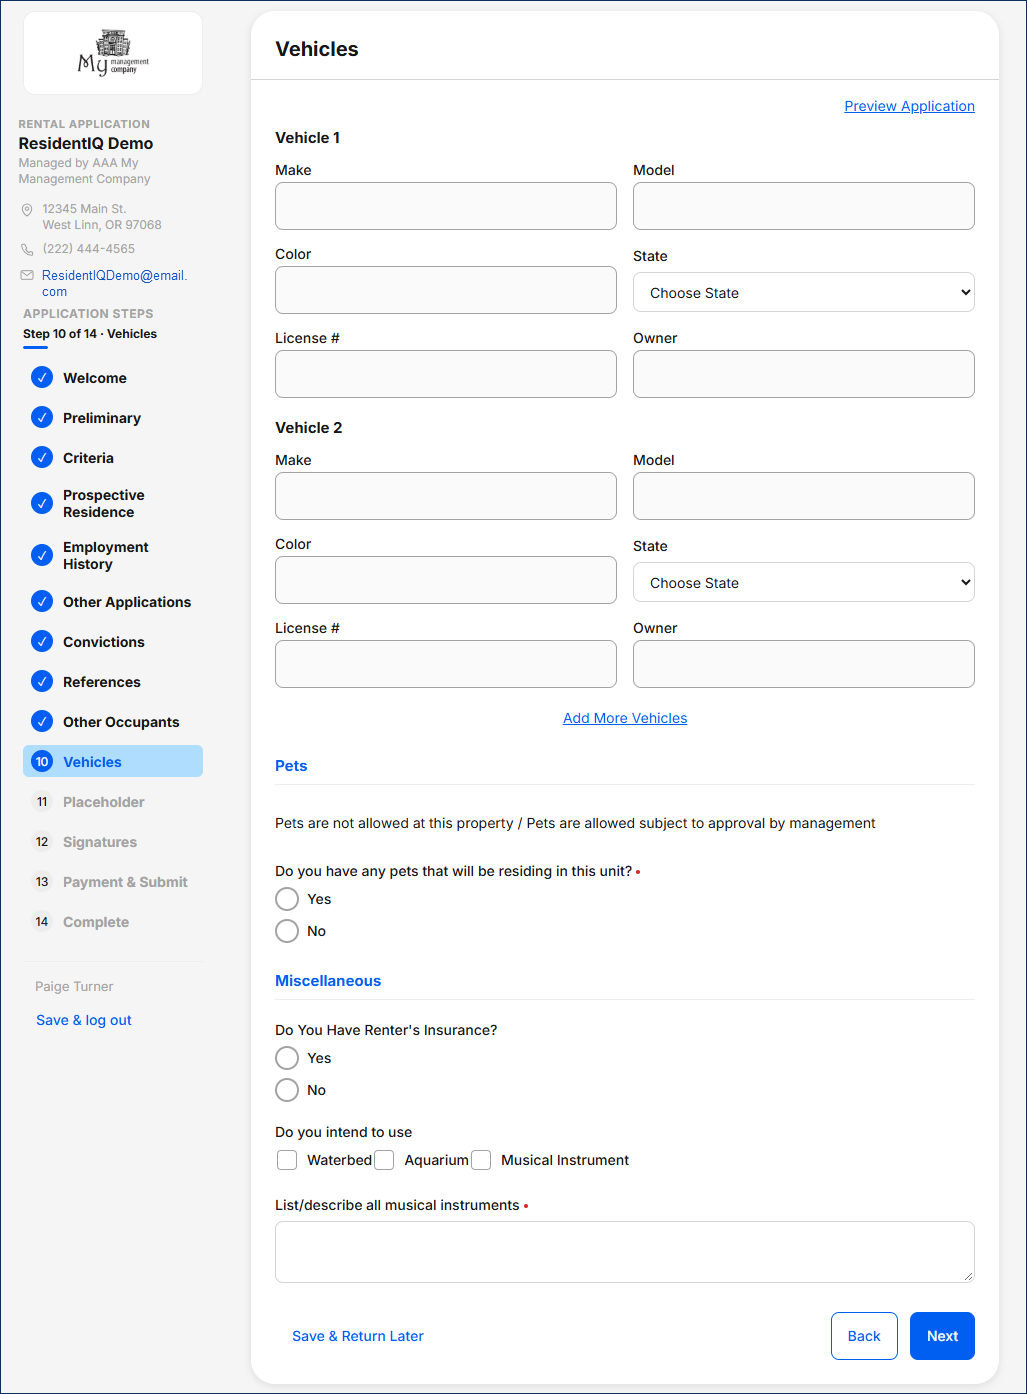
13. Information - Vehicles:
Applicants enter information about their vehicles. They also indicate whether they have pets or renter’s insurance and whether they plan to have a waterbed, aquarium, or musical instruments in the home.
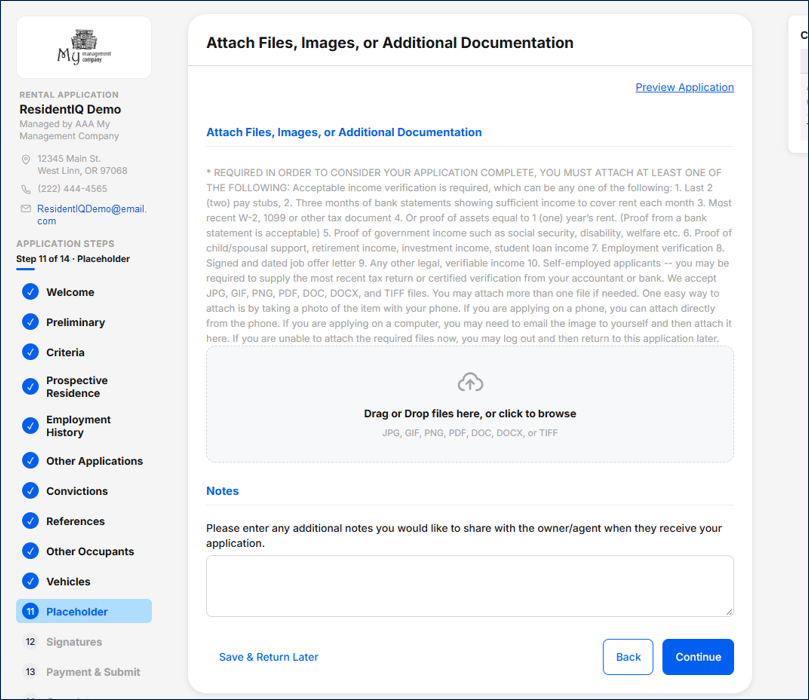
14. Information - Attach Files, Images. Or Additional Documentation:
Applicants can upload documents to include with their application, such as proof of income, subsidized housing letters, or support animal letters. They can also add notes for the reviewer.
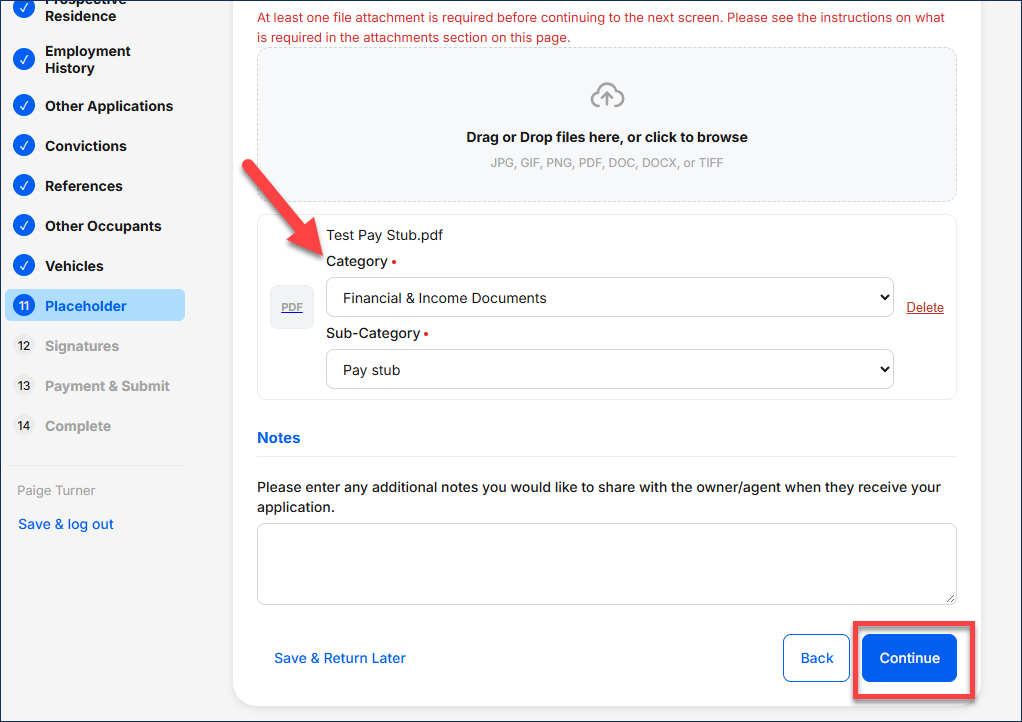
For each uploaded document, applicants select the category that best identifies the document type. Some categories will also require the applicant to select the appropriate sub-category.
After all documents have been uploaded and categorized, they select Continue.
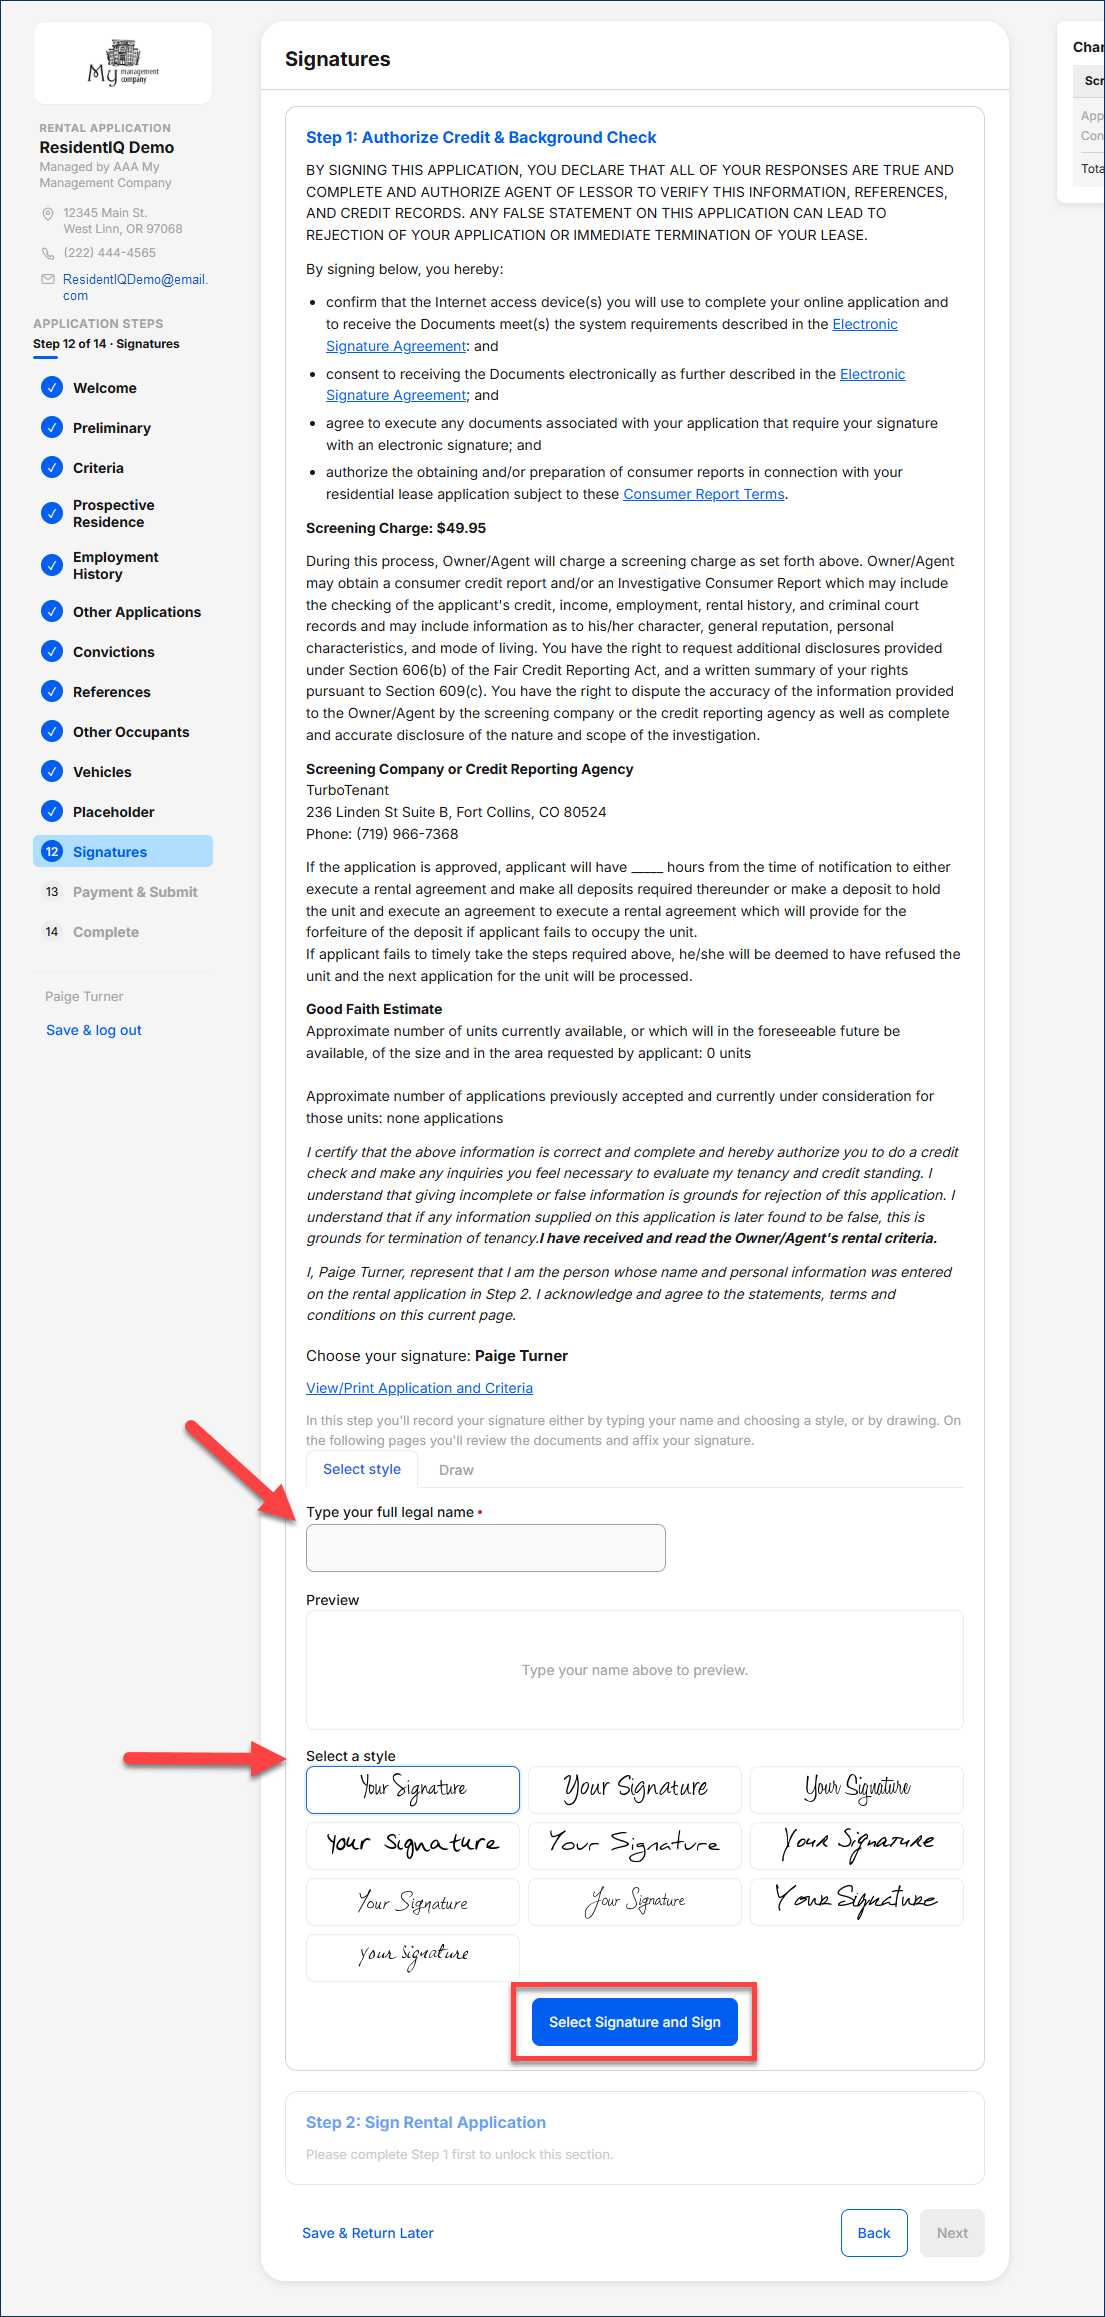
15. Signature – Authorize Credit & Background Check:
Applicants first review the Authorize Credit & Background Check language. They then create a signature by typing their legal name exactly as it appears on the application and selecting a signature style. When finished, they click on Select Signature and Sign.
16. Signature – Sign Rental Application:
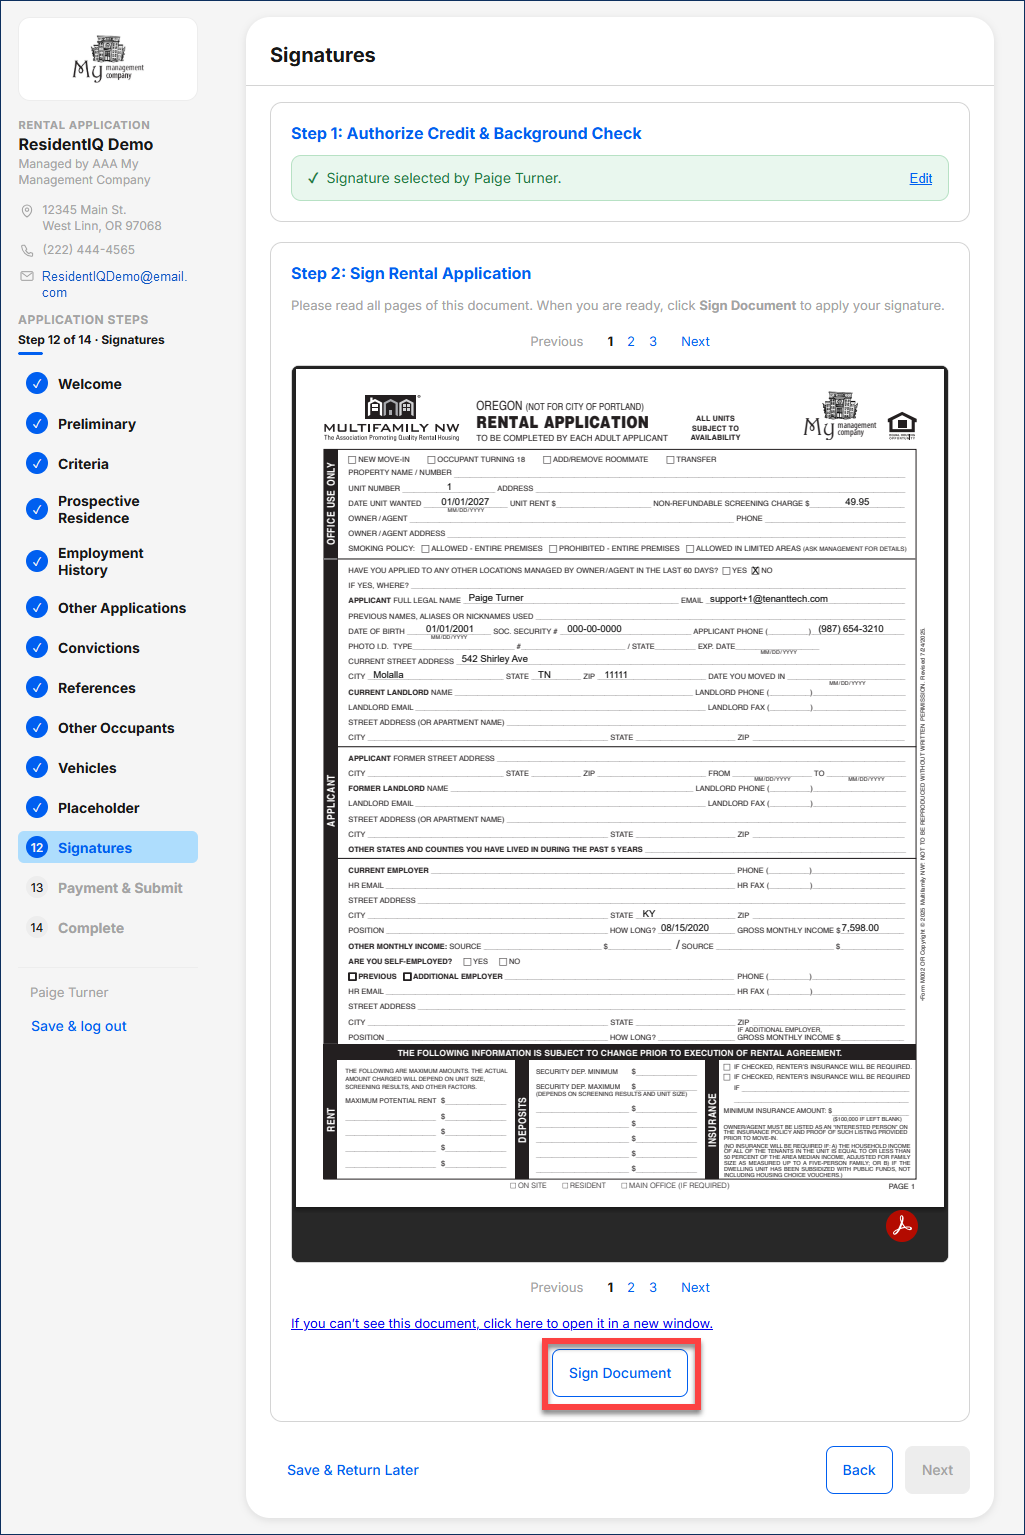
Next, they will a see a PDF version of the application, to review and make sure the fields they entered during the application process are shown correctly. When they are ready, they click Sign Document located under the PDF.
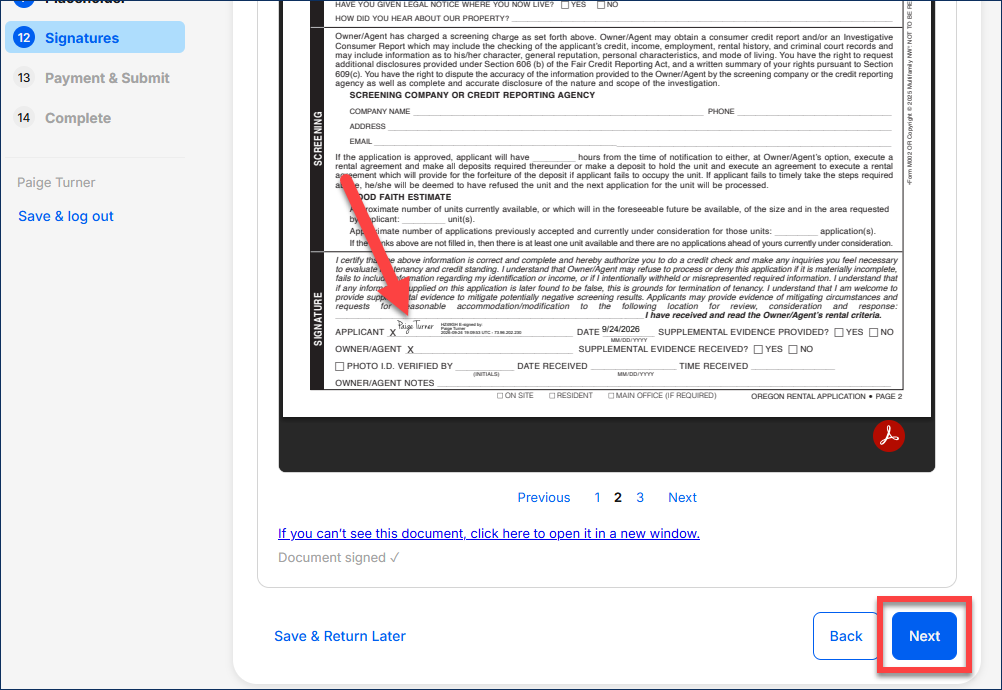
The applicant’s signature now appears on the PDF application. They select Next to continue to the final phase of the application.
17. Payment & Submit:
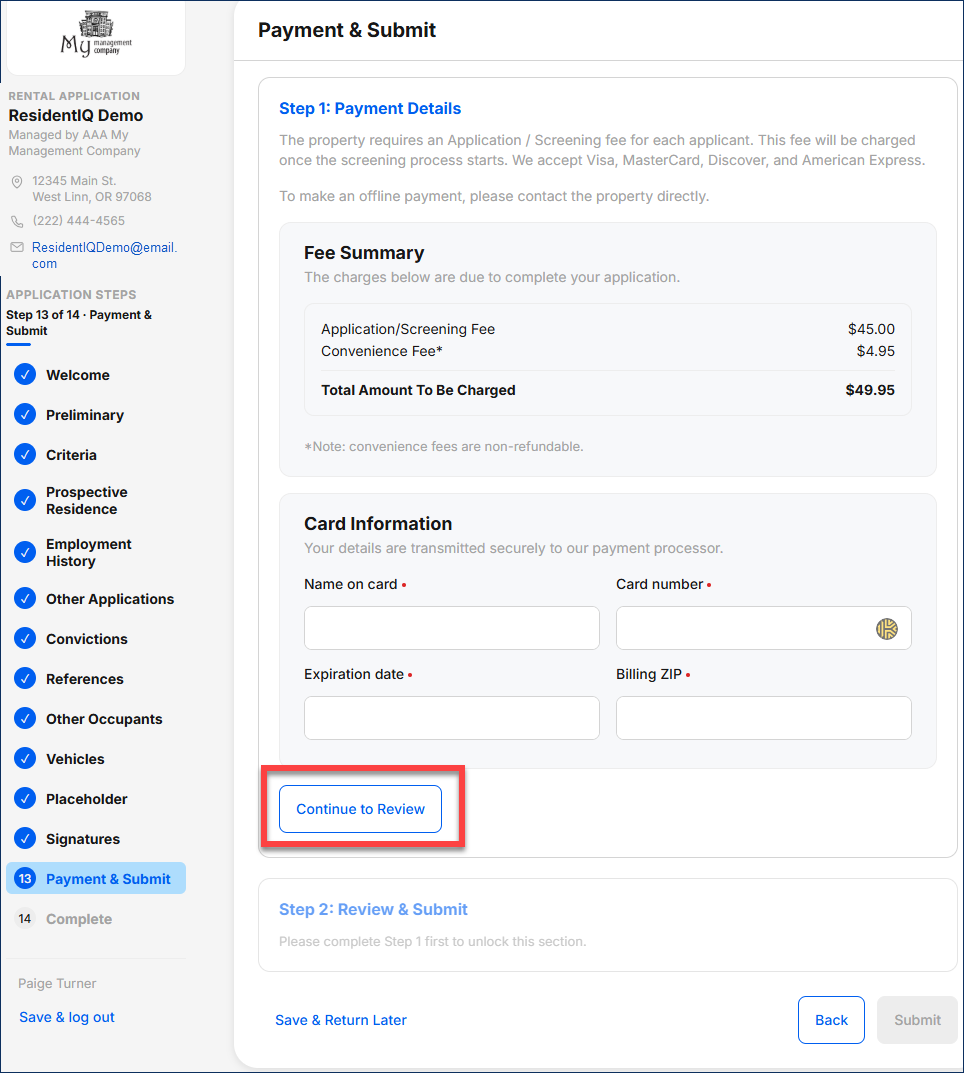
The page displays a summary of the fees that will be charged. If the property accepts online application payments through an integrated payment processor, such as APTEXX, applicants enter their payment information. They then select Continue to Review.
18. Payment – Review & Submit:
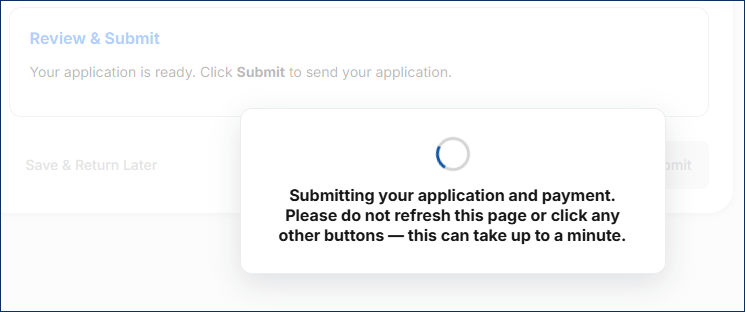
The applicant reviews the payment details shown at the top of the page. If all information is correct, they select Submit.
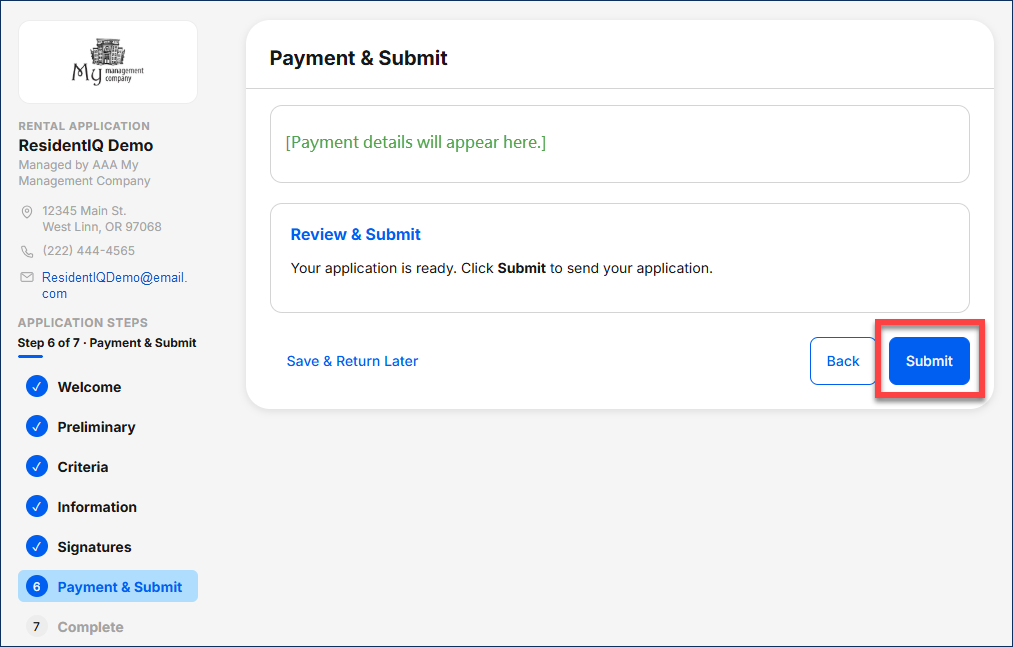
*Note: After the applicant selects Submit, the payment may take a minute to process. The applicant should not refresh the page or select any buttons while the payment is processing.
19. Complete – Application Complete:
The application has been submitted. The applicant receives a confirmation email from noreply@tenanttech.com. They can also provide feedback about their online application experience.